Battle Royale Macro-Rotation Guide: 4 Zone Strategies
This guide outlines four essential macro-rotation strategies for Battle Royale games, designed to enhance your zone positioning and achieve a 30% higher top-3 placement rate through effective map reading and anticipation.
Mastering the art of Battle Royale Macro-Rotation is paramount for consistently securing high placements. This guide delves into four critical zone positioning strategies that can significantly elevate your gameplay, potentially boosting your top-3 placement rate by a remarkable 30%.
Understanding Macro-Rotation Fundamentals
Macro-rotation in Battle Royale games refers to the large-scale movements players make across the map to position themselves favorably within the shrinking safe zones. It’s a strategic dance between anticipating the next zone, securing advantageous terrain, and avoiding early engagements that could jeopardize your game. A strong understanding of these fundamentals is the bedrock upon which all advanced strategies are built, ensuring you're not just reacting to the zone, but proactively dictating your position.
Effective macro-rotation isn't merely about running into the safe zone; it involves a sophisticated assessment of multiple factors. This includes understanding the game's specific zone mechanics, recognizing high-traffic areas, and identifying optimal pathways that offer both cover and quick access to the next circle. Without a solid grasp of these basic principles, even the most intricate strategies will fall flat, leaving players vulnerable and out of position.
The Core Principles of Zone Anticipation
Anticipating where the next zone will close is a skill that separates average players from top performers. It requires an intuitive understanding of zone patterns, which often have subtle tells based on the current zone's location and the overall map layout. Developing this intuition comes from experience, but also from actively analyzing zone movements in every game.
- Observe Zone Tendencies: Pay attention to how zones typically pull in different areas of the map. Some games favor central pulls, while others might push towards specific landmarks or edges.
- Map Knowledge is Key: A deep familiarity with the map's topography, choke points, and high-ground positions allows for more informed predictions.
- Early Game Information: Use early game information, like drop spots and initial engagements, to infer potential end-game locations and plan your rotations accordingly.
Ultimately, a solid foundation in macro-rotation means moving with purpose, not just instinct. It's about making calculated decisions that minimize risk and maximize your chances of survival and success in the late game. This proactive approach ensures you're always one step ahead of the competition, ready to capitalize on their mistakes while securing your own safety.
Strategy 1: The Early Edge Hold
The Early Edge Hold strategy involves positioning yourself on the outer perimeter of the current safe zone, preferably on the side that aligns with your prediction for the next zone's pull. This approach allows you to control a segment of the zone's edge, often catching late-rotating enemies off guard and providing a relatively safer path into subsequent circles. It’s a patient strategy that prioritizes information gathering and minimizing exposure.
Executing this strategy requires careful observation of the map and a good sense of timing. Instead of rushing to the center, you deliberately choose a less contested path along the zone's border. This provides opportunities to pick off stragglers, gather additional loot from players caught outside the zone, and scout ahead for advantageous positions within the next circle. The key is to be proactive in your movement, always aiming to be at the edge before the zone fully collapses.
Benefits of Early Edge Holding
Holding the early edge offers several distinct advantages that can significantly improve your game. It reduces the likelihood of being caught in a crossfire from multiple directions, a common pitfall when pushing directly into the center of the zone. This strategy also provides a clearer picture of enemy movements, as you are observing them funneling into the zone from the outside.
- Reduced Engagement Risk: By staying on the edge, you minimize the number of angles from which you can be attacked, allowing for more controlled engagements.
- Information Advantage: You gain valuable intel on enemy rotations, often spotting players who are forced to move into the zone late and are therefore vulnerable.
- Safer Looting: Areas on the edge of the zone are often less contested, allowing for safer looting of resources from eliminated players or untouched buildings.
This strategy is particularly effective in games where zones tend to pull towards specific quadrants or have predictable patterns. By anticipating these pulls and positioning yourself on the favorable edge, you can often secure high ground or strong defensive positions before other teams even realize where the zone is heading. It transforms defensive play into an offensive advantage, allowing you to control the flow of the game from a secure vantage point.
Strategy 2: Center Control & Predictive Push
The Center Control & Predictive Push strategy focuses on establishing dominance in the central areas of the safe zone early on, then using that central position to make an informed, aggressive push towards the next predicted zone. This strategy is more high-risk, high-reward, as central positions are often contested, but they offer unparalleled flexibility and the shortest rotation paths to any subsequent zone. It demands strong combat skills and excellent map awareness to execute successfully.
Achieving center control isn't just about occupying the middle; it's about securing a power position within that central area. This might involve taking a strong defensive building, a high-ground advantage, or a cluster of cover that offers protection from multiple angles. Once established, this position allows for continuous monitoring of incoming players and provides the quickest routes for the predictive push, minimizing travel time and exposure when the next zone is revealed.
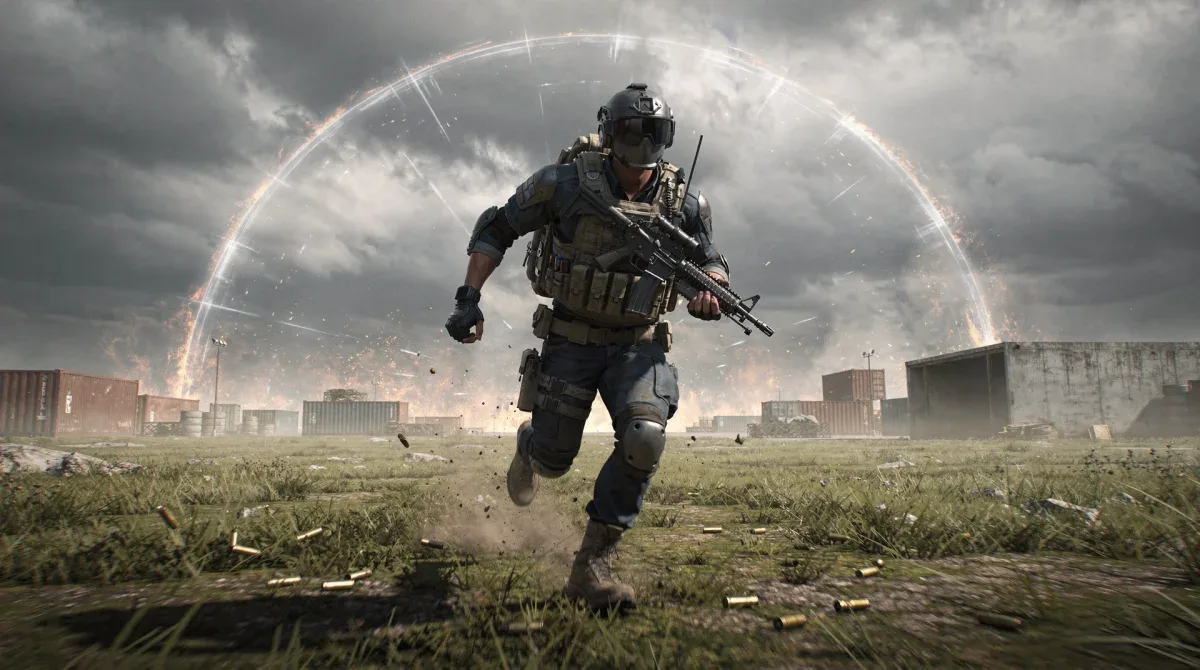
Leveraging Central Advantage for Rotations
From a central position, you have the advantage of being able to react to any zone pull with minimal travel. This allows you to delay your rotation slightly, gathering more information about enemy positions and the exact nature of the next circle. This delayed, informed push is crucial for maintaining the element of surprise and securing the most advantageous spots.
- Optimal Viewpoints: Central positions often provide superior sightlines across a wider area of the map, enabling better enemy spotting and tactical decision-making.
- Reduced Travel Time: Being central means less time spent running through open areas, decreasing your vulnerability to long-range engagements.
- Strategic Flexibility: You can quickly pivot to any part of the next zone, adapting to unexpected pulls or enemy pressure with greater ease than those on the perimeter.
The predictive push element comes into play once the next zone is revealed. Instead of waiting for it to close, you leverage your central position to move aggressively towards what you anticipate will be the most favorable part of the new circle. This often means pushing through choke points or contested areas, requiring coordinated team play and decisive action to clear the path and establish your next stronghold. It's a strategy that rewards confidence and calculated aggression, leading to dominant late-game performances.
Strategy 3: The Flanking & Pinch Play
The Flanking & Pinch Play strategy is a dynamic approach that focuses on exploiting enemy rotations by positioning your team to intercept them as they move into the safe zone. This involves identifying probable enemy rotation paths and setting up an ambush or a 'pinch' maneuver, where you attack from one side while another team or the zone itself pushes them from another. It requires excellent communication and coordination, making it ideal for organized squads.
This strategy is less about securing a static position and more about actively manipulating the battlefield. You are essentially using the zone as your ally, forcing enemies into predictable paths where you can engage them on your terms. Success hinges on precise timing and a deep understanding of enemy movement patterns, which often become apparent as the zone shrinks and options become limited. It's a high-impact strategy that can quickly decimate opposing teams and significantly thin out the lobby.
Coordinating Flanks for Maximum Impact
Effective flanking and pinching require more than just identifying a target; it demands synchronized movement and fire. One part of your team might apply pressure from a direct angle, while another moves wide to cut off escape routes or attack from an unexpected direction. The goal is to create an inescapable situation for the enemy, forcing them into a disadvantageous fight.
- Identify Choke Points: Focus on areas where players are funneled, such as narrow passages, bridges, or the edges of dense terrain.
- Communicate Intent: Clear and concise communication is vital to ensure all team members understand their role and timing in the pinch.
- Use the Zone as a Wall: Position yourselves so the closing zone acts as a barrier, limiting enemy movement and forcing them towards your firing lines.
This strategy is particularly effective in the mid-to-late game when the player count is lower and individual team movements become more pronounced. By actively seeking out and eliminating vulnerable teams, you not only reduce the competition but also often acquire valuable loot and resources. The Flanking & Pinch Play is a testament to aggressive tactical prowess, turning enemy rotations into opportunities for decisive engagements.
Strategy 4: The Zone Anchor & Late Rotate
The Zone Anchor & Late Rotate strategy involves holding a strong, defensible position near the edge of the current safe zone, often one that offers good cover and sightlines, and then performing a quick, calculated rotation into the next zone at the last possible moment. This strategy minimizes exposure during rotations and capitalizes on the chaos of other teams rushing into the new zone. It’s a patient, methodical approach best suited for players who prioritize survival and calculated engagements.
The 'anchor' position is crucial here. It must be a spot that can withstand pressure, provide good intel on incoming enemies, and offer a relatively safe exit path. This could be a fortified building, a natural rock formation, or a ridge that provides an overview. By holding this anchor, you force other teams to move past you or engage you on your terms, while you conserve resources and maintain a strong defensive posture until the opportune moment to move.
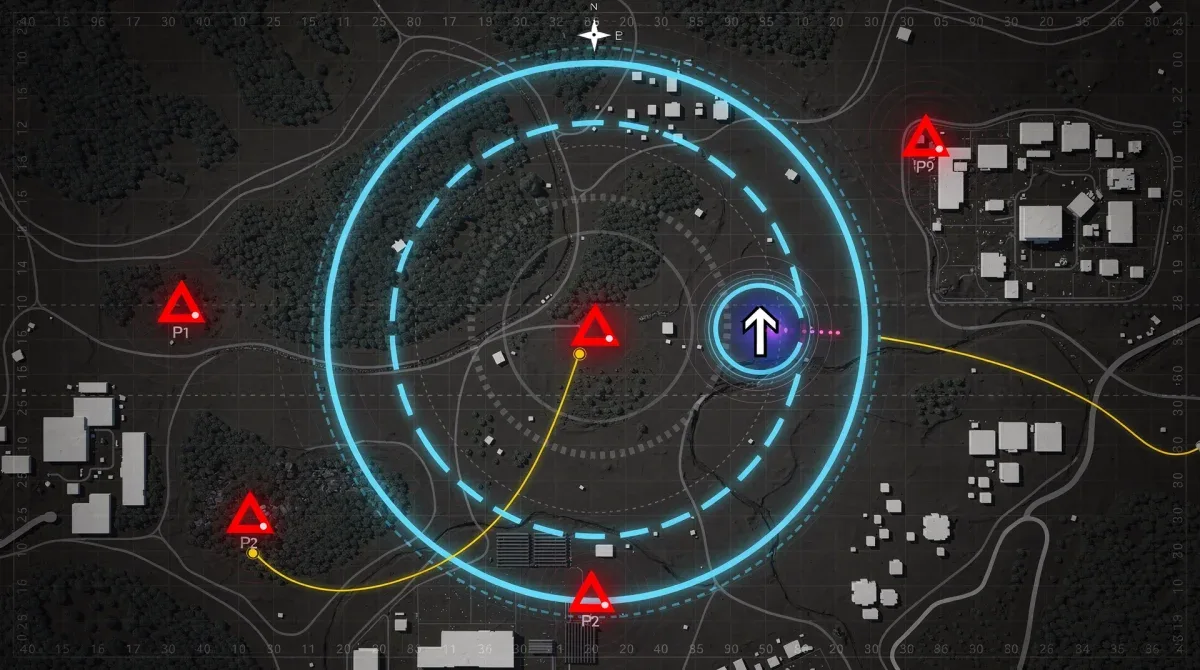
Timing Your Late Rotations for Maximum Safety
The success of the Late Rotate hinges entirely on impeccable timing. Moving too early exposes you to unnecessary engagements, while moving too late risks being caught by the encroaching zone. The ideal window is often right as the zone begins to push, creating a natural screen behind you and forcing enemies ahead to focus on their own rotations rather than yours.
- Observe Enemy Movements: Wait for other teams to commit to their rotations, creating openings and reducing immediate threats on your path.
- Utilize Utilities: Smoke grenades, healing items, and movement abilities are critical for making quick and safe late rotations under pressure.
- Prioritize Cover: Always move from cover to cover, minimizing time spent in the open, especially when the zone is closing and visibility is reduced.
This strategy is particularly effective in situations where the zone is pulling across open ground or through highly contested areas. By being the last to move, you can often slip through gaps created by other engagements, or capitalize on teams who are caught off guard by the zone's pressure. The Zone Anchor & Late Rotate is a masterclass in patience and precision, allowing players to consistently reach the final stages of a match with minimal damage and maximum resources.
Adapting to Dynamic Zone Changes
While the four strategies provide a robust framework, the true mastery of Battle Royale macro-rotation lies in the ability to adapt to dynamic zone changes. No two games are exactly alike, and the zone will rarely behave in a perfectly predictable manner. Players must continuously assess the evolving battlefield, enemy positions, and their own resources to pivot between strategies or modify them on the fly. This adaptability is what separates good players from truly exceptional ones, ensuring consistent top-tier performance regardless of game circumstances.
Adaptation means being flexible with your initial plan. If you intended an Early Edge Hold but the zone pulls aggressively towards a heavily contested area, you might need to quickly switch to a more defensive Zone Anchor approach, or even attempt a calculated Predictive Push if an unexpected opening appears. It’s about reading the game state in real-time and making intelligent adjustments to maintain your positional advantage.
Key Elements of Adaptive Rotation
Developing adaptive rotation skills involves more than just reacting; it requires a proactive mindset that constantly evaluates potential outcomes. This includes anticipating multiple possible zone pulls and having contingency plans for each, as well as understanding how your current loadout and team composition influence your strategic options. The more prepared you are for various scenarios, the better equipped you will be to adapt.
- Constant Map Review: Regularly check your map and minimap for zone updates, enemy pings, and available cover.
- Resource Management: Keep track of your healing, utility, and ammunition. These resources dictate what strategies you can realistically execute.
- Team Communication: In squad play, clear and concise communication about perceived threats, zone predictions, and proposed rotations is paramount for quick adaptation.
Ultimately, dynamic zone adaptation is about making the best decision with the information available, even when that information is incomplete or rapidly changing. It’s a skill that refines with every game played, pushing players to think critically and strategically under pressure. By embracing flexibility, players can turn unpredictable zone changes from a threat into an opportunity, consistently outmaneuvering their opponents.
Advanced Tips for Consistent Top Placements
Beyond the core strategies, there are advanced nuances that can further refine your macro-rotation and significantly improve your consistency in securing top placements. These tips often involve a deeper understanding of game mechanics, psychological warfare against opponents, and meticulous self-analysis. Integrating these subtle yet powerful techniques can provide that extra edge needed to consistently outperform the competition.
One such tip is to always consider the 'third-party' potential of any rotation. When two teams are fighting, a third team (you) can often swoop in to clean up the remnants, securing kills and loot with minimal risk. Planning your rotations to position yourself for these opportunities, especially near contested zone edges or popular landmarks, can dramatically increase your kill count and overall success rate. It's about being opportunistic and leveraging chaos to your advantage.
Mastering the Mental Game of Rotation
The mental aspect of macro-rotation is often overlooked but is incredibly important. Staying calm under pressure, making decisive calls, and maintaining a positive mindset even when things go wrong are crucial. A clear head allows for better decision-making and more effective execution of complex strategies, especially in the intense late-game scenarios.
- Analyze Your Losses: After each game, reflect on your rotations. Did you make the right call? What could have been done differently? Learning from mistakes is vital.
- Predict Enemy Mindset: Try to think like your opponents. Where would they go? What risks would they take? This helps in anticipating their movements.
- Stay Confident, Not Cocky: Believe in your strategy and execution, but avoid overconfidence that leads to reckless plays.
Another advanced technique involves 'zone baiting,' where you intentionally expose yourself slightly or make noise to draw enemy fire, revealing their positions without fully committing to an engagement. This information can then be used to plan a safer or more advantageous rotation. However, this is a high-risk maneuver that requires excellent gun skill and quick reflexes. Ultimately, consistent top placements come from a holistic approach that combines strategic prowess, mechanical skill, and a sharp mental game, all synergizing to create an unstoppable force on the Battle Royale battlefield.
| Strategy | Brief Description |
|---|---|
| Early Edge Hold | Secure the zone perimeter early, anticipate pulls, and catch late rotators. |
| Center Control & Predictive Push | Dominate the zone center, then make informed, aggressive pushes to the next circle. |
| Flanking & Pinch Play | Intercept enemy rotations by setting up ambushes and coordinated attacks. |
| Zone Anchor & Late Rotate | Hold a strong defensive position, then rotate at the last possible moment. |
Frequently Asked Questions About Battle Royale Macro-Rotation
What is macro-rotation in Battle Royale?▼Macro-rotation refers to the strategic, large-scale movements players make across the map to position themselves optimally within shrinking safe zones. It involves anticipating future zone pulls and securing advantageous terrain to improve survival chances and placement.
How does zone anticipation improve my gameplay?▼Zone anticipation allows you to make proactive decisions, moving into the next safe zone before others. This reduces rushed rotations, minimizes exposure to enemy fire, and helps secure prime positions like high ground or strong cover, leading to better outcomes.
Is the 'Early Edge Hold' strategy always safe?▼While generally safer than pushing center, the 'Early Edge Hold' isn't foolproof. You must remain vigilant for teams rotating late from outside the zone and be prepared for potential engagements. Always prioritize cover and maintain awareness of your surroundings.
When should I use the 'Center Control & Predictive Push' strategy?▼This strategy is best suited for players or teams with strong combat skills and excellent map knowledge. It's effective when you can confidently secure and hold a central power position, using it to dictate engagements and react quickly to zone shifts.
How can I practice effective macro-rotation?▼Practice by consistently analyzing zone movements in your games, studying map layouts, and reviewing your own gameplay. Focus on understanding why zones pull in certain directions and experiment with different rotation paths to build your intuition and decision-making speed.
Conclusion
Mastering Battle Royale macro-rotation is a complex but incredibly rewarding endeavor. By diligently applying these four zone positioning strategies – the Early Edge Hold, Center Control & Predictive Push, Flanking & Pinch Play, and Zone Anchor & Late Rotate – players can significantly elevate their strategic gameplay. Consistent practice, coupled with adaptive decision-making and a deep understanding of game mechanics, will undoubtedly lead to a higher top-3 placement rate and a more dominant presence on the battlefield, transforming good players into truly exceptional ones.
